|
||||||
|
|
|
||||||
|
|
|
Provide remote desktop assistance to your customers by operating your own support center. With PlanetRemote Standard or Plus editions on their computers, your customers can transfer control of their stations to the computer you designate as the support center for your organization. A PlanetRemote support center is ideal
for:
Benefits of setting up your own support center:
Step 1 - Designate a Master Computer for Your Support Center Designate one computer as the support center. Each request for support
will be automatically directed to the master computer, where you can access
your customer's desktop and files remotely to provide direct and immediate
assistance. Step 2 - Install PlanetRemote Plus on the Master Computer Install PlanetRemote Plus Edition on your support center's master computer.
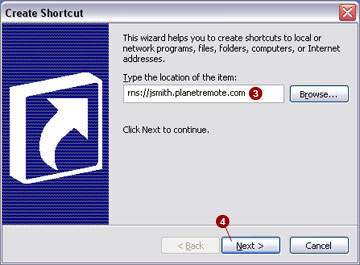
Step 3 - Create an Internet Name for the Master Computer PlanetRemote Plus Edition includes PlanetDNS Client, which will enable you to create an Internet name (domain name) for the support center computer. The Internet name will allow your customers to activate a request for support on your support center computer from anywhere on the Internet.
Step 4 - Run PlanetRemote Viewer in Listening Mode PlanetRemote includes PlanetRemote Viewer, which will also need to be running as you set up your support center.
Step 5 - Configure your Router As noted on the Ports used by PlanetRemote page, TCP Port 5500 is used when running your own support center. The process of establishing the appropriate connections between the Internet and your LAN computers is typically referred as by the terms Port Forwarding (Linksys), Virtual Servers (D-Link) and Pinholes and may be completed by using your router's control panel. You will need to configure your router to accept incoming connections on TCP Port 5500 and direct the connection to your master computer's LAN IP address. For more details, see Setting up your Router to Work with PlanetRemote.
Step 6 - Configure your Firewall (if applicable) Configure the firewall on your master computer, if you have one installed, to allow incoming connections on TCP Port 5500. For more details, see Setting up Your Firewall to Work with PlanetRemote.
Step 7 - Install PlanetRemote Standard on Your Customers' computers Install PlanetRemote Standard Edition on each customer computer.
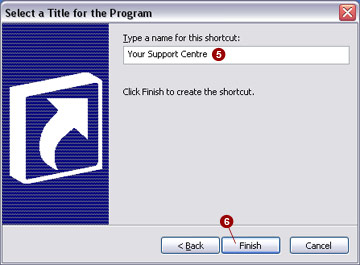
Step 8 - Add Support icon to your customer's desktop Create and place the support icon on your customer's desktop.
Step 9 - Requests for Assistance to Operating Support Center When your customers require assistance, they double-click the desktop
support
Related Topics
|
|
Copyright © 2004 PlanetDNS. All Rights Reserved. |


 tab
tab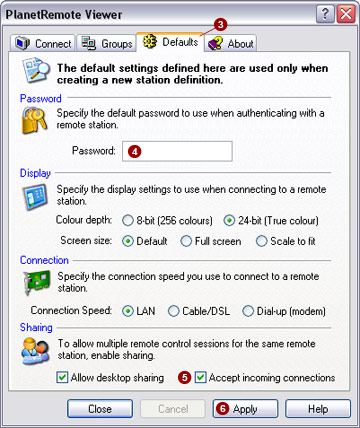
 field.
 option.
 button.
 icon (shown below),
named as you have selected, will be created on your customer's desktop.
icon (shown below),
named as you have selected, will be created on your customer's desktop. .
.