 |
You can easily take control of your PlanetRemote-enabled computer remotely
over the Internet from any Local computer that has PlanetRemote Viewer
installed.
To Control Your Computer Remotely over the Internet
Make sure you have PlanetRemote Viewer installed
on your Local computer.
Click on the PlanetRemote
viewer icon  on your desktop to start the application. on your desktop to start the application.

Select the Connect
 tab if not already selected. tab if not already selected.
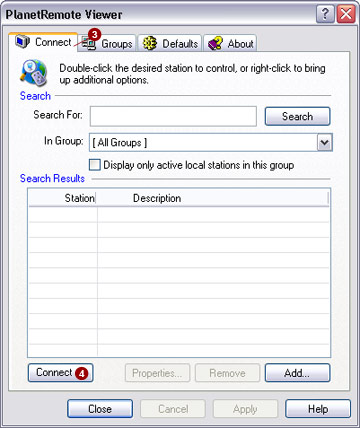
Press the Connect
 button. This will bring up the Connect
dialog shown below: button. This will bring up the Connect
dialog shown below:
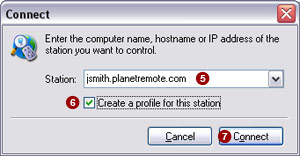
Enter the computer name, host name or IP address
of the PlanetRemote-enabled computer you want to control in the Station  field. If you
have PlanetDNS Client installed (Included in PlanetRemote Plus Edition),
then you can use the Internet name (domain name) you have chosen for the
PlanetRemote-enabled computer in the Station
field. field. If you
have PlanetDNS Client installed (Included in PlanetRemote Plus Edition),
then you can use the Internet name (domain name) you have chosen for the
PlanetRemote-enabled computer in the Station
field.
For example, if you chose jsmith.planetremote.com
as your Internet name in PlanetDNS Client, you would type jsmith.planetremote.com
in the Station field.
Click the Create
a profile for this station  if you want to add this
computer to your station list. if you want to add this
computer to your station list.
Press the Connect
 button. This will show the Enter
Password dialog: button. This will show the Enter
Password dialog:
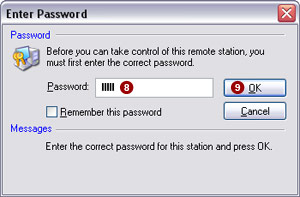
Enter in the Password
 field the password of the PlanetRemote-enabled computer
you want to control remotely. field the password of the PlanetRemote-enabled computer
you want to control remotely.
Press the OK
 button to connect to the PlanetRemote-enabled computer. button to connect to the PlanetRemote-enabled computer.
-
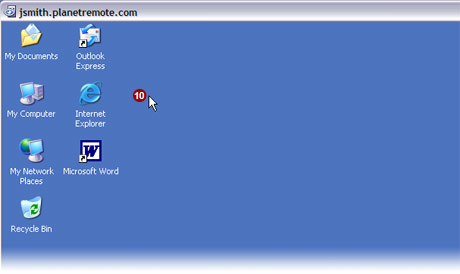
After you have pressed the Connect
button, it will take a brief period of time for the PlanetRemote-enabled
computer to initialize. Once initialized, you will have access to the
desktop image
 of the PlanetRemote-enabled
computer. Responses to the actions of your Local computer
mouse and keyboard will be displayed on the desktop image. of the PlanetRemote-enabled
computer. Responses to the actions of your Local computer
mouse and keyboard will be displayed on the desktop image.
|
|